You’ve had the thrill of seeing your wedding photos, and now it’s time to read our advice on how to create the perfect wedding album.
Picking photos for your wedding album is fairly straightforward and will cost you nothing but your time.
The more effort you invest in this process, the happier you will be with the result.
So make your favourite drink, sit down, relax, and prepare to learn how to create the perfect wedding album.
We usually advise choosing your images using a desktop or laptop computer. Access to a mouse and keyboard can make the photo selection process quicker and easier.
Alternatively, if you prefer an iPad or similar device, writing your selection down using pen and paper is usually easier.
On this page:
Storytelling vs favourite photos vs pleasing everyone
The main thing to decide is whether to tell the day’s story, have a collection of your favourite photos, or try to please everyone who will see the album (parents, grandparents, etc.) or a mix of these options.
But what exactly do these options mean?
Method 1: Telling The Story Of Your Wedding Day
Telling the story of your wedding day involves choosing photos from each part of the day to create a comprehensive and compelling start-to-finish narrative.
Tip: Break the day into logical parts and allocate several photos to each part. For example, you could divide your wedding day as follows:
- bridal preparations
- guests arrivals
- wedding ceremony
- drinks reception
- family pictures
- newlywed photos
- speeches
- cake cutting
- dancing
Then, allocate a few photos to each part of the day. For example, the list above has nine parts, so you could allocate ten newlywed photos plus four photos to every other part of the day; this would total 50 photos, which is ideal for a 30-page wedding album.
Adjust the parts of the day to suit your wedding day and allocate the number of photos to each part based on how many pages/photos you would like in your wedding album:
Use the following to guide the number of pages your album will likely contain; the more pages, the more expensive the album will be.
Our albums can contain a minimum of 30 pages and a maximum of 80 pages.
- 30 pages = approximately 50 images
- 40 pages = approximately 65 images
- 50 pages = approximately 80 images
- 60 pages = approximately 95 images
- 70 pages = approximately 110 images
- 80 pages = approximately 125 images
Using the ‘storytelling method’ to choose your photos ensures that anyone looking at your wedding album for the first time will have an excellent insight into your wedding day: the people, the clothes, the setting, and all the little details that made your day unique.
Pros: Your wedding album will detail everything about your wedding day, showing off all the various aspects of the day. Over the coming years, you can look at your wedding album and see what made the day so wonderful.
Cons: It’s easy to get carried away and choose many more images for your album than any other method. If your wedding album budget is limited, you might need to be ruthless when culling photos from your selection!
Method 2: Choosing Your Favourite Photos
Choosing your favourite photos for your wedding album is self-explanatory.
Your selection might not necessarily ‘tell the story of the day’, but you have chosen your favourite photos to appear in the album.
For example, you might decide that although you like the photos of the bridal preparations, they aren’t your favourite photos of the day, and you would rather dedicate more pages to your newly-wed photos.
The result is an album that might not contain photos of ‘detail shots’ (rings, flowers, etc.) or photos of guests, but what matters is that you have picked your favourite photos.
Pros: Your wedding album is entirely created with your favourite photos without compromise.
Cons: You might regret not including photos of other parts of the day.
Method 3: Pleasing Everyone
This option is for anyone with an extended family who wants to keep parents, grandparents, etc., happy.
Perhaps you want to include mini-albums for friends or family, and you feel obliged to include a few pictures of the family or friends.
Every family is different, and sometimes, designing a wedding album means remembering a wedding day is often about the gathering of family and friends, and your album can reflect that.
A wedding album can also be an important family document, something you can show and be proud of for years.
The emotional value of your wedding album will increase as time goes by, especially if you have children or your grandparents are elderly and you want to be able to view pictures of them in years to come.
Pros: Including photos of family and friends will bring a smile to their faces when they see the album. That can be priceless.
Cons: Pleasing everyone else can mean not pleasing yourself. It’s your wedding album, and pleasing everyone can be a compromise.
How to create the perfect wedding album: the selection process
Now you’ve got an idea of the purpose of your wedding album (telling a story, favourite photos, pleasing everyone), and it’s time to choose a process for choosing photos for your wedding album.
Most of our clients will have a folder containing several hundred wedding photos. How do you narrow this number of photos to a collection suitable for a wedding album?
We recommend three methods: 1. culling, 2. picking, and 3. writing down.
Pick which method you feel most comfortable with.
Culling
Culling photos is straightforward. You will delete all of the photos you do not want to appear in your wedding album, and we will use the final group of photos left to design your wedding album.
- We suggest backing up the wedding photo folder on your device. Create a new Google email address, and you will receive enough free storage to store your photos ‘in the cloud’. Once your Gmail account is activated, you can upload all of your wedding photos into the free storage that comes with your Gmail account (the storage is called ‘Google Drive’). You now have a secure backup of your wedding photos, which can be accessed via any device with internet access. Don’t use backup photos when choosing your wedding album photos.
- On your computer or laptop, create a copy of the folder containing all of your wedding photos. Name this copied folder ‘Wedding Album Photos’.
- Within the folder Wedding Album Photos, delete any colour photos you do not want to appear in your album. Leave the black-and-white photos for now. Be sure to compare similar photos (for example, there may be many similar photos of you with your immediate family—pick your favourite photo/s within that grouping, perhaps look for what facial expressions you prefer most, and delete the rest. If you are unsure between a few photos, leave them for now and move on to the next photo.
- Once you have reviewed all the colour photos, repeat Step 3 for all the black-and-white photos. Delete any black-and-white images you do not want in the album.
- Repeat Steps 3 and 4 until satisfied that you have removed all the photos you do not want in your album.
- Choose the cover for your wedding album and any upgrades to add to the album order. These options can be viewed here: Luxury Wedding Albums
- Send us a list of the number part of each photo left in your folder, your album cover choice, and any upgrade options. You can email a spreadsheet with the list of numbers or the list of photos.
For example:
Cover: Acrylic front cover with Navy Blue Leatherette Spine and back cover + 2 Parent Albums with Navy Blue Leatherette coversPhotos:
1000
1010
1015
1030
1080
Picking
Another way to choose the photos for your wedding album is ‘picking’. This method involves picking your favourite photos from one folder and putting them into another folder.
This second folder will contain all of the photos to be used to design your wedding album.
- We suggest backing up the wedding photo folder on your device. Create a new Google email address, and you will receive enough free storage to store your photos ‘in the cloud’. Once your Gmail account is activated, you can upload all of your wedding photos into the free storage that comes with your Gmail account (the storage is called ‘Google Drive’). You now have a secure backup of your wedding photos, which can be accessed via any device with internet access. Don’t use backup photos when choosing your wedding album photos.
- On your computer or laptop, create a copy of the folder containing all of your wedding photos. Name this copied folder ‘Wedding Album Photos’.
- Create a new, empty folder and name this folder ‘Picked’.
- Go through the Wedding Album Photos folder and move any colour photos you want to appear in your album into the ‘Picked’ folder. Leave the black-and-white photos for now. Be sure to compare similar photos (for example, there may be many similar photos of you with your immediate family—pick your favourite photo/s within that grouping, perhaps looking for what facial expressions you prefer most. If you are unsure between a few photos, leave them for now and move on to the next photo.
- Once you have reviewed all the colour photos, repeat Step 4 for all the black-and-white photos. If you do not want any black-and-white photos in the album, ignore them.
- Repeat Step 4 and Step 5 until you have chosen all the photos you want in your wedding album.
- Choose the cover for your wedding album and any upgrades to add to the album order. These options can be viewed here: Luxury Wedding Albums
- Send us a list of the number part of each photo in your ‘Picked’ folder, your album cover choice, and any upgrade options. You can email a spreadsheet with the list of numbers or the list of photos.
For example:
Cover: Acrylic front cover with Navy Blue Leatherette Spine and back cover + 2 Parent Albums with Navy Blue Leatherette covers
Photos:
1000
1010
1015
1030
1080
Writing Down
If you don’t have access to a computer (desktop or laptop) and you are choosing the photos by viewing your online web gallery or viewing a folder of photos on an iPad or notepad, you might find writing your selection of photos down on a piece of paper most convenient.
- We suggest backing up the wedding photo folder on your device. Create a new Google email address, and you will receive enough free storage to store your photos ‘in the cloud’. Once your Gmail account is activated, you can upload all of your wedding photos into the free storage that comes with your Gmail account (the storage is called ‘Google Drive’). You now have a secure backup of your wedding photos, which can be accessed via any device with internet access. Don’t use backup photos when choosing your wedding album photos.
- Access your wedding photos. You can view your photos on your computer, iPad or phone.
- Now go through the folder containing your wedding photos and write down the number part from the name of the colour photos you want to appear in your album. Leave the black-and-white pictures for now. Be sure to compare similar images (for example, there may be many similar photos of you with your immediate family – pick your favourite photo/s within that grouping, and perhaps look for what facial expressions you prefer most. If you are unsure between a few photos, leave them for now and move on to the next image.
- Once you have reviewed all the colour photos, repeat Step 3 for all the black-and-white photos. If you do not want any black-and-white photos in the album, ignore them.
- Repeat Steps 3 and 4 until you have chosen all the photos you want in your wedding album.
- Choose the cover for your wedding album and any upgrades to add to the album order. These options can be viewed here: Luxury Wedding Albums
- Please send us a list of the numbers you have written down (the number part of each photo), your album cover choice, and any upgrade options. You can also email a spreadsheet with the list of numbers or the list of photos.
For example:
Cover: Acrylic front cover with Navy Blue Leatherette Spine and back cover + 2 Parent Albums with Navy Blue Leatherette covers
Photos:
1000
1010
1015
1030
1080
What Happens Next?
Once we have received your email detailing your selection of photos for your wedding album and any upgrades, we will advise you of the estimated time to complete the album design.
Use the following as a guide to the number of pages your album is likely to contain; the more pages, the more expensive the album.
Our wedding albums can contain a minimum of 30 pages and a maximum of 80 pages.
- 30 pages can accommodate approximately 50 images
- 40 pages can accommodate approximately 65 images
- 50 pages can accommodate approximately 80 images
- 60 pages can accommodate approximately 95 images
- 70 pages can accommodate approximately 110 images
- 80 pages can accommodate approximately 125 images
Please note that the figures here are for guidance only.
We won’t know exactly how many pages are required until your design is completed.
For example, if you choose 50 images, your album could require additional pages to accommodate your selection of images; we can usually fit about 50 images into a 30-page album but occasionally require 2 – 4 extra pages if you choose lots of images which look better spread over one or two full pages (group photos, newly-wed shots etc. usually look better spread over one or two pages, whereas details shots of the rings/flowers etc. usually work better as smaller images 4 to a page).
If you wish, you can increase the number of images and pages and pay a little extra to accommodate the increased number of pages.
When we have finished designing your wedding album, we will create a PDF of the design.
This will allow you to check the design before it’s sent for printing. Minor further editing is usually fine and can vary between albums depending on the scale of editing required.
Once the design is approved, it is sent for printing and at this stage, it’s too late to make further changes!
Your wedding album is printed and hand-finished right here in Scotland.
This means a fast turnaround, with completed albums usually ready to ship within ten working days.
Your completed order is shipped directly to you, and we usually add your mobile number and/or email address to the order so you can receive shipping updates.
Please don’t hesitate to contact us if you require any additional information or advice about how to create the perfect wedding album. We’re always happy to help!
Wedding planning advice
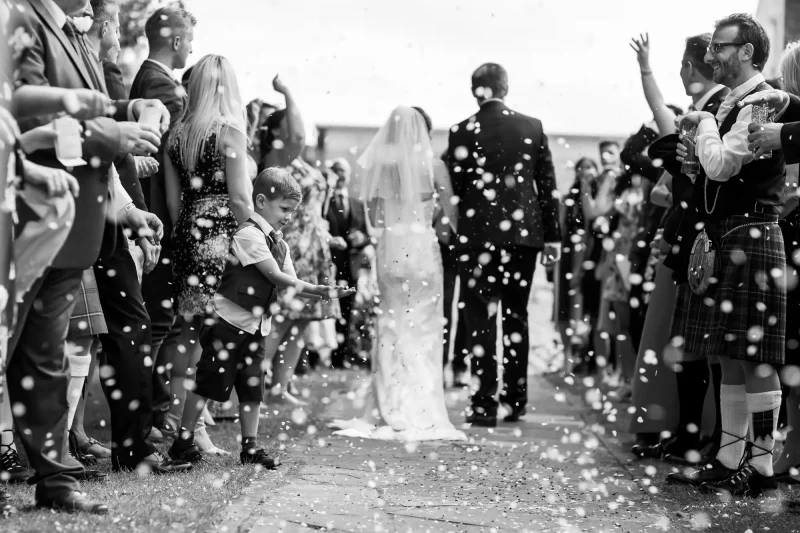
- Confetti at weddings – everything you need to know to add fun and magic to your big day
 Confetti at weddings adds a burst of joy and celebration. Discover the different types and how we capture the perfect confetti photo for you.
 - Double the magic: the benefits of having two photographers at your weddingDiscover the benefits of having two photographers at your wedding. Capture every moment from different angles for a complete visual story.
- Edinburgh’s most Instagrammable locationsDiscover Edinburgh’s most Instagrammable locations for stunning engagement photos. Let our photography beautifully capture your love story.
- Embrace the joy of an intimate elopement in Scotland: why smaller can be sweeterCelebrate your love with an intimate elopement in Scotland. Discover the joy of a private ceremony and why smaller can be sweeter!
- Engagement photography – why you should arrange a photoshoot before your big day!Engagement photography – find out why you should arrange a photoshoot before your wedding day! See our pricing too!
- Hiring a social media wedding content creator: pros, cons, and alternativesDiscover the benefits and potential drawbacks of hiring a social media content creator for your wedding. Explore the pros and cons here.
- How to choose a photographer for your wedding: a comprehensive guideThis detailed guide will help you learn how to choose a wedding photographer to capture the timeless moments of your special day.
- How to create the perfect wedding albumYou’ve had the thrill of seeing your wedding photos, and now it’s time to read our advice on how to create the perfect wedding album. Picking photos for your wedding album is fairly straightforward and will cost you nothing but your time. The more effort you invest in this process, the happier you will be… Read more: How to create the perfect wedding album
- Questions to ask a photographer in 2024 : top tips on how to ensure you get the best photosQuestions to ask a wedding photographer in 2024. Expert advice with our top tips on ensuring you get the best photos of your big day.
- Should you consider an unplugged wedding ceremony?Discover the pros and cons of having an unplugged wedding ceremony. Learn how to strike a balance for a memorable and respectful celebration.
- The 20 BEST Edinburgh wedding venues – Our insider’s guide to where to get marriedThe definitive guide to the 20 BEST Edinburgh wedding venues. See everything from unique, quirky and budget to luxury 5-star hotels.
- The benefits of documentary style wedding photographyFind out why documentary style wedding photography, a candid and genuine approach, allows your photos to truly reflect your love story.
- Why have a reading at a wedding ceremony?Discover how incorporating reading into your wedding ceremony can add depth and uniqueness. Discover the significance of readings.
- Why you should get prints and a wedding album of your photosDiscover the importance of why you should get prints and a wedding album of your photos and explore why it’s worth the investment.